
Tuesday, February 13, 2018

Wednesday, January 24, 2018
Letting My Creativity Flow With A Heavyweight Drawing Pad
Letting My Creativity Flow With A Heavyweight Drawing Pad
 I have always had a love of drawing and it is nice to have some great ways to explore and to let my creativity out. There are some great supplies for drawing out there and I can always find something that works well for any kind of creative endeavor that I want to take on. Finding the right supplies helps me out a lot when it comes to my drawing.
It is nice to have some awesome drawing pads that I can use for my best designs. I love finding some new pads that I can use and I love finding some pads to use of the heavyweight kind. These pads are great for practicing some blending techniques and for doing some sketches and for experimenting with all kinds of drawing.
The heavyweight drawing pad that I have been using has worked well for my drawing hobby. I love to do some drawing after work and on the weekends as well. I can always find some inspiration from all of the sports and hobbies that I love to do, and from the beauty of nature that is all around me. My drawing pad is my buddy for doing some great drawing.
Tuesday, April 4, 2017
Using Gesso To Make Your Canvas Smooth For Painting

The importance of using a smooth canvas for painting cannot be
overemphasized. Gesso is the most commonly used primer for acrylic painting.
Every painter knows how enjoyable it is to paint on primed canvas compared to
using unprimed canvas. Gesso makes the surface more absorbent and gives the
painting a fine finish, which is what every painter is after, unless you are
looking to have a special kind of effect. Gesso can either be bought or
prepared at home. Both options have their upsides and downsides. Buying gesso
will cost you more but will save you valuable time which you can use to paint.
Preparing gesso at home takes time but the good thing about it is that you can
adjust it to suit your preferences.
Preparing your smooth canvas for painting: Steps to Follow
You will need gesso, a paintbrush, sandpaper and some water. Start
by diluting the gesso with water; the amount of water you add depends on the
effect you are looking to achieve. Use the paintbrush to apply the diluted
gesso to the canvas in parallel strokes. You should then let the canvas sit for
a couple of hours for the gesso to dry. The longer you let it sit, the better;
so, if you can leave it to dry overnight, that would be the best option. Before
applying the second layer of gesso, you need to check whether the first layer
is dry. If the canvas feels cold to touch, the gesso is not completely dry. You
need to give it a few more hours before doing anything to it.
Use sandpaper to sand the canvas after the first layer is dry and
then apply the second layer of gesso in perpendicular strokes to the first
layer. Again, you need to let it sit for a couple of hours before you do
anything to it. You can apply as many layers of gesso as you want depending on
the effect you want to achieve, but just remember to let the gesso dry and sand
the canvas after every layer. The more the layers of gesso, the more absorbent
the painting surface will be. The final coat should be applied using undiluted
gesso. Only start painting after the gesso dry.
Bottom Line
Using gesso to prime your canvas is not a difficult task. Just
follow the steps above and you will end up with a smooth canvas for painting.
Gesso is also versatile as you can add some paint to it to tint it and end up
with a wonderful effect on your smooth canvas for painting. Although you have
the option of buying pre-primed canvas, preparing the canvas on your own is fun
and you can play around with the gesso to create some special effects that you
would not be able to achieve with a pre-primed canvas.
Thursday, March 16, 2017
What Type Of Brush Should I Use For Oil Painting
When oil
painting, brushes will make or break your finished masterpiece. A good brush
will help you bring your creation to life while a bad brush will just serve to
frustrate and impede your painting every step of the way. Even the best
painters will have trouble painting something they can be proud of with a bad
brush. The best brushes for oil painting are a valuable investment and worth
every penny. When deciding on the best brushes for you, you will need to
consider the purpose of the brush, the feel of the brush in your hand and the
end result you want to achieve.
Best Brushes
for Oil Painting:

Purpose
Essentially,
oil painting brushes are made from two different hair types. The bristle brush
uses bristle hair from pigs while sable hair brushes use sable hair from the
sable, which is similar to a weasel. Bristle brushes work exceptionally well
when first starting out your painting as they cover large areas with ease. The
ideal bristle brush is a half-inch or wider. Sable brushes are perfect for
incorporating details and working in small areas, and should be smaller than a
half-inch. If you buy a sable brush, make sure it is a sable brush specifically
for oil painting as watercolor sable brushes lack the spring needed when
painting with oil.
Shape
There are
several different shapes and styles of brush heads for oil painting including
rigger, mop, angle, fan, filbert, bright, flat and round. If you use the wrong
style head for a certain aspect of your painting, you are not using a bad
brush, just the wrong one. It is important to know which type of style will
work best for the aesthetic you are wishing to achieve. If you are just
starting out, and want to jump right into painting without experimenting with each
set of style just to find the best brush for you, go with the flat and filbert
brush. You can achieve nearly every look you want for your painting with those
two brushes. The flat brush will create the sharp edges while the filbert
provides softer, rounder strokes.
Feel
Just as each
artist is different, so are their hands. Where one type of brush handle feels
good and natural in one person's hand, that may not hold true for another.
Visit an art supply store and notice how each brush feels in your hand, run
your fingers along the tip of each bristle and watch to see if the hairs are
stiff and bounce right back in place as they should. Natural bristle and sable
brushes are always better for oil painting than synthetic fibers.
Determining the best brushes for oil painting is
about as individualized as each painting they create. Don't be afraid to
experiment with different brushes and different brands to find the best brush
for you.
Monday, February 27, 2017
What Type Of Brush Should I Use For Acrylic Painting?
For centuries, oil paints dominated the market for art materials. However, by the mid twentieth century, a new material started to find favor with artists. Now, acrylic paints are just as popular as watercolor and oil are, with artists the world over. If you enjoy creating art, one thing that you will want to know is what are the best paint brushes for acrylic painting.

If you have no experience of working with acrylics, it is often quite daunting to try to identify the best paint brushes for acrylic painting at an art store. Usually, these stores have a plethora of paint brushes laid out in front of you. Synthetic materials, like nylon, are the best paint brushes for acrylic painting. Supple and soft brushes are suitable for applying thinned paint, and stiff brushes work well for thick paint applications. Acrylics are tougher on animal hair brushes, which can expand and become less springy when placed in water.
The majority of brush makers offer synthetic brushes specially designed for painting with acrylics. These brushes are springier and more durable than those designed for watercolor. They can withstand more use and maintain their shape nicely, making them an excellent option for novices.
While you are in an art supply shop, pick up the brushes and bend their tips using your thumb. They ought to feel firm, similar to hogs hair brushes (some synthetics do feel like this). If a brush lacks sufficient resistance, thicker acrylics will be hard to maneuver on your canvas surface.
Paint brushes have varying bristle shapes that affect the marks they make. Flat bristles are rectangular and long. They have flat 'toes' and can produce flat strokes. Also, they can be used to produce controlled lines and defined edges.
Filbert brushes have curved 'toes'. These brushes can hold a decent quantity of paint and produce a broad range of marks. For this reason, they are commonly used by acrylic and oil painters alike. Round brushes are the most useful types of brushes. They have round 'toes' and can create controlled, intricate marks along with thicker ones.
Brushes can be rather costly. To reduce the expense, you could consider purchasing a set of paint brushes. These sets come in a variety of shapes and sizes. Some sets are not particularly high quality, however they are still a helpful option for novice painters. They enable you to become accustomed with the different sizes and kinds of brushes, without making a huge investment.
After you have determined the best paint brushes for acrylic painting, you can grow your collection of brushes and purchase higher priced, better quality brushes of your choosing. There's no rush, so take the time to learn and let your creative juices flow.
OurArtSupplies.com
Tuesday, February 21, 2017
How To Choose The Best Watercolor Brushes
When planning for a painting project one of the things you need to
do is choose the best brush. However, the process of choosing can be
challenging because of the variety of options available in the market today.
With the right information, you can be able to narrow down your search for the
best watercolor brushes and achieve exceptional results after your project.

Consider the bristles
There are different types of brushes with some featuring natural
hairs while others are made of synthetic bristles. Professional painters prefer
those made of natural hairs because of the advantages associated with them. A
particular advantage is that natural hairs have ridges that work effectively in
holding more watercolor. Individuals that choose synthetic brushes must compensate
by picking brushes that are larger. A job that is done by a natural hair brush
number 8 requires that the painter uses a synthetic brush number 10.
Shape is key
Brushes are available in a lot of shapes. However, few are
designed to provide exceptional results when using watercolors. Individuals
with extensive experience can attest to the efficiency of using round or flat
brushes when using watercolors. A coated brass ferrule or seamless nickel
ferrule ensures that no bristles are lost during use. The material used to make
the ferrule also ensures that the brush does not get damaged due to rust. A
ferrule is the part of the brush that joins the bristles and the handle.
The size matters
The size of the brush you choose for your watercolor painting
project plays a huge role on the final outcome. If you want something that will
create finer details it may be prudent to use a small brush. A large painting
that does not necessarily pay attention to finer details can be done using a
larger brush to ensure you cover large areas within a short time. Natural
brushes hold more watercolor than synthetic colors meaning the choice of
materials can also play a role in determining appropriate size. It is equally
important for you to choose a size that you feel comfortable with.
The brand
Before settling on any of the best watercolor brushes it may be
wise to consider the brand. Keep in mind that a lot of brushes in the market do
not conform to the highest standards of quality and may start getting worn out
a few days after initial use. Choose brushes that are manufactured by
trustworthy brands to guarantee you enjoy the benefits of good quality
products.
The cost of the best watercolor brushes
Take some time to find out the cost of the various brushes in the
market. The best watercolor brushes are not necessarily expensive. Choose
products that are sold at reasonable costs.
Monday, January 30, 2017
How To Transfer Your Drawing Onto A Canvas Using Charcoal For
Drawing

Before plunging into the steps of how to transfer your
drawing onto a canvas using charcoal for drawing, it is important to understand why this needs
to be done. The main thing is you have just completed a work of art which in
terms of size is but a replica of the final artwork that you have in mind.
Without utilizing charcoal for drawing, you will have to recreate your
masterpiece part by part and line by line.
No exquisite artist wants to do that. That's like repeating
the creative process unnecessarily.
Besides, there is a huge chance that you might not be able to replicate
the images in the drawing as faithfully as the original composition. Charcoal
drawing to the rescue.
Charcoal drawing takes time, but it's the artist's first
choice when enlarging his or her composition. Even Michelangelo did not start
by painting his masterpieces on the incredibly large ceiling of the Sistine
Chapel. There had to be a small version of the images before they could be
exploited to gigantic proportions. However, it's not clear if the genius
utilized charcoal for drawing at all in order to complete his monumental task.
Nevertheless, modern painters are beholden to charcoal for
drawing especially when it's time to transfer their works to a piece of canvas.
Chances are, you have seen street painters compose their drawings from scratch.
Still, in most cases, these unsung artists use either a model or a view.
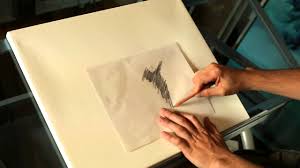
That model could be you. But let's say that you want that
painting of you to be transformed into a fresco for display in your home or
room? Charcoal for drawing is the modern solution.
Depending on the size of the painting that needs to be blown
up, it could take a few hours to finish a charcoal for drawing task. Skipping
the all-important task can result in a haphazard piece of work that lacks the
proportion as well as the perspective of the original material.
The quintessential artist's trick to transfer his or her
creative vision to a large piece of canvas involves heading to the commercial
copying machine, which can enlarge any image to the desired size. Of course,
artists of centuries past did not have this luxury, so modern painters beat
them when it comes to maintaining the aspect ratio of their creative works.
Life is unfair, but charcoal for drawing is here to
stay. This approach involves turning
over the enlarged paper copy of the original artwork and practically charcoal
painting the surface of the images. But
before doing this, the artist has to underline sections that do not have any
images. This way, the charcoal for drawing is applied only on portions of the
painting with objects.
Thus, charcoal for drawing is a preparatory period for
accomplishing the task of rendering the original concept into its final and
much bigger format. With ratios and proportions intact and accurate to
specifications, the artist proceeds with completing the creative task with oil
paints.
Thursday, January 12, 2017
How To Prepare Your Canvas For Painting With Oil Paints
Before painting on a blank painting canvas, it is necessary
to properly prepare it. Artists differ in their preferred method of
preparation, but there are some basic steps that need to be followed.
Canvases for painting consist of fabric, usually either
cotton or linen, stretched upon a frame. In their initial state, the fabric is
not primed, which would cause paint to seep through the fabric. Not only would
this make it difficult to paint, but over time, the oil paint would deteriorate
the fabric. As such, proper priming is necessary when starting out with a blank
canvas.

If the stretched canvas consists of only the raw fabric, the
first step is to size it. Sizing is necessary to protect the fabric itself, as
it acts as a sealant. Sizing generally consists of a thin animal glue solution.
The front surface of the canvas should be primed, as well as the corners and
sides.
Once the sizing has dried, the ground coat is applied. The
ground coat gives the canvas surface a uniform texture, degree of absorbency,
and color. It provides a good base for the oil paints that will be applied, and
also adds more protection to the canvas.
Gesso is the most common material used for the ground coat
when a canvas is being prepared for oil painting. Basically, gesso is a
material that combines a white pigment with oil. It can either be prepared by
the artist, or purchased ready to be applied to the canvas. It comes in a
variety of different consistencies so that the artist can choose the one that
best suits his or her needs and painting style. Although a cream style
consistency is often used, some gesso has a paste-like consistency that can be
used to add more texture to the blank painting canvas. It is also possible to
obtain gesso in colors other than white. Water-based gesso products are also
available, but these are more commonly used for acrylic painting.
If a smooth painting surface is needed, gesso is best
applied to the blank painting canvas using several thinner coats. If a rougher
and more textured surface is desired, one coat may suffice. Smoother surfaces
work best for paintings that involve fine detail.
The gesso should be stirred before applying it to the blank
painting canvas. If a smooth painting surface is desired, brush the gesso onto
the canvas in a single direction. Clean the brush used to apply the gesso so
that it does not harden. After the first coat is dry, sandpaper can gently be
used to smooth the surface. After sanding, thoroughly remove the dust from the
canvas surface with a soft, dry cloth. Apply the second coat of gesso, brushing
it on in the opposite direction of the first coat. As with the sizing, the
ground coat should be applied to the corners and sides of a stretched canvas,
as these areas also require protection. Once the ground coat is dry, the canvas
can be used for painting.
Wednesday, January 11, 2017
How To Prepare Your Canvas For Painting With Acrylic Paints

The common types of canvas used for painting are cotton and
linen. Painters often buy unprimed canvases and prepare them themselves as they
can play around with the primers to achieve the effect they wish. However,
primed canvases are also available at the stores. If you are using acrylic
paint, it is always important to prime your blank painting canvas to avoid
using up too much paint as the unprimed canvas is usually very absorbent. You
need to know the right type of primer to use as some are only suitable for oil
paint. The most common type of primer used for acrylic paint is acrylic gesso.
The steps involved
You will need water, a sponge, acrylic gesso, a stirrer
which can be either metal or plastic, some paper towels, a plastic container
and stretched canvas. You will also need a flat brush with 1"-2"
bristles. Start by dipping the sponge in water then use it to wet the blank
painting canvas. Using the stirrer, stir the acrylic gesso in the jar then pour
some of it into the plastic container.
Add some water to the acrylic gesso in the plastic container
to make it thinner. This makes it more viscous and it will therefore spread
with more ease and penetrate the blank painting canvas more easily. You can
also add acrylic paint of any color you want if you wish to achieve a different
effect from the usual white. Use the paper towel to wipe any spills and clean
the stirrer.
Using the brush, apply the gesso on the fabric in parallel
horizontal strokes. You should then leave the gesso to dry. You can give it an
hour, but the longer you let it sit, the better. If the fabric feels cold, the
gesso is still wet and you need to give it more time. Depending on the level of
detail you wish to achieve, you can have more than one layer of gesso. But you
should always let one layer dry before laying another and lay them
perpendicular to each other.
Final Thoughts
You need to be very careful when working with
acrylic gesso as it dries up very fast. Therefore, keep the jar closed when you
are not using it and pour just enough gesso for the job to avoid having too
much leftover gesso. You should also wipe any spills as soon as they occur
because when the gesso dries, it is not water-soluble and can therefore be very
difficult to wipe off. Do not pour any leftover gesso down the drain as it can
cause serious blockage in your pipes.You should only start painting when you
are positive that the blank painting canvas is dry.
Wednesday, December 14, 2016
How To Make Homemade Gesso
Painting is an enjoyable hobby whether
you do it for show or personal reasons. However, the materials required to
paint can become expensive, especially gesso. Gesso is used to prepare surfaces
for painting, including canvases. It's considered a primer that helps to smooth
out your work surface and ensure that the paint doesn't soak into your canvas.
Likewise, it can be used as a glue for collages and creating thicker canvases
from cardboard, etc.

The Gesso Recipe
The gesso recipe featured can be used for both acrylic and oil
paints, as well as any other paint. This gesso recipe makes approximately two
quarts, which can be stored for up to six weeks if not needed immediately.
The homemade gesso recipe starts with a plaster mix. You'll need
one cup of hot water, one cup of glue (white or PVA), and one cup of plaster
powder or Plaster of Paris.
You will also require three cups of acrylic or oil paint for
this gesso recipe. White is usually the most common color, but you can choose
any that will complement your work. You'll also need a container to hold the
gesso recipe, a cup that can be discarded, and something with which to mix the
concoction. You may also want a dust mask for safety reasons.
Get all of your ingredients together for the gesso recipe and
put on your dust mask. Place the hot water in your container (that can hold at
least three quarts). Then, you can add the plaster (but do not add the water to
the plaster because it could blow up in the face). Next, measure out and add
the glue, stirring to combine.
Once the gesso recipe is mixed, you can add the white paint and
mix once more.
The Results
While this homemade gesso recipe may not be an exact match to a
commercial gesso recipe, it should produce similar results. Likewise, you may
only require one coat with this gesso recipe, though you can add as many layers
as necessary.
After applying the gesso recipe, you will wait until it dries.
Then, you can sand down the dried gesso recipe, wipe it off and apply more of
the gesso recipe until the canvas looks right. However, it's important to
remember to let the gesso dry on the canvas before sanding and priming again.
You will finish up with a slightly chalky, ready-to-paint canvas.
Friday, December 2, 2016
How To Get Started With Pastels Artwork
Painting with pastels provides an exceptional method of
creating artwork with the same advantages of conventional paints and acrylic or
watercolor pigments. Pastels are
essentially an artistic medium that is available in stick form. They contain a binder and pure powdered
pigment.
Oil pastels and soft pastels are the two types
available. The best oil pastels are
harder to clean and often require solvents; however, they do not leave powdered
pigment behind. Soft pastels are easier
to clean and can be easily blended with your fingertips. However, they produce
dust. Below are some of the supplies
needed to get started with pastels:
Pastels

A number of different brands of pastels are available. If you are not certain about what to choose,
going to an art supply store might be a very good idea. This way you could get to test them out on
paper. Additionally, you will be able to
get a feel for the quality of each pastel.
Surface
Either board or paper will be needed to draw on. Paper is most commonly used with pastels;
however, wooden boards are now available.
Personal taste will ultimately determine your preference for paper or
board. Therefore, it is important to try
out a few different types of boards and papers to determine your
preference.
Drawing Table
If you already have a drawing board that can be angled in
certain directions, your pastel board or paper can simply be placed on the
table to work. Otherwise, your paper can
be attached to a well-made drawing board.
Colored Pencil
These are remarkable for laying out a composition prior to
drawing. Use colored pencils that match
or are the same as the color as what is going over them when your underdrawing
is being created. For example, use a
light sienna or umber pencil to outline trees or golden fields.
Tape
Get an easily-removable, acid-free tape. The purpose of this tape is to attach your
artwork paper to the drawing table. Good
artist tape has a moderate to low tack adhesive that can be removed or
re-positioned without damaging paper surfaces or leaving behind a sticky
residue.
Blending Tools
Your fingers can be used for blending or you can invest in
some blending tools if you so desire. One tool commonly used is a pastel
shaper. Shaped like a paint brush, many
of these have a silicon tip which does not absorb the material and are easy to
clean. Of course, brushes will do the
trick as well. Fan and blender brushes
can be used for feathering and scrubbing pigments.


Fixative
The best oil pastels are constantly in danger of being
smudged. As such, there are some pastel
artists who use spray fixatives to keep the particles in place. However, many artists will not use any
fixatives. Fixatives typically have a
dulling or darkening effect on the vibrancy of pastels; therefore, they should
be used with caution.
OurArtSupplies.com
OurArtSupplies.com
Wednesday, November 30, 2016
Getting Started With Oil Painting On Canvas

Oil painting is a beautiful and expressive art medium that
might seem intimidating at first. While it does take practice, anyone can start
and improve on it with the right knowledge and some essential oil paint supplies.
Oil paint is well known for its rich colors and glossy dried surfaces that can
add a great amount of visual appeal to a finished painted scene. The following
tips will help you achieve good results with any type of oil-painted scene.
The most common surface for oil painting is a stretched
canvas that's been pulled taut over a wood frame. You can buy a variety of
sizes of stretched canvases at ourartsupplies.com, or you can build and stretch
your own if you have a knack for DIY projects. Once you have the canvas in the
size you want, you'll need to prep the surface with a type of acrylic paint
called gesso, which will ensure a smooth application of your oil paints. If you
choose not to prep the canvas with gesso, keep in mind that your oil paints will
soak into the weave of the canvas rather than dry on top of it. This option is
not necessarily a wrong one; it all depends on the desired effect you want with
your finished painting.
 For a smooth and even surface prepped with gesso, it's a
good idea to apply it with a paint roller you can find in hardware stores,
especially when you're painting on a larger canvas. Once your prepped canvas is
completely dry, you'll be ready to prep your oil paints through a technique
called glazing. This process will bring out the richness and glossiness of each
color. When you're first starting out with oil painting, you won't need a large
number of different colors. Good quality oil paint tubes of primary colors are
essential, namely red, yellow, and blue. With some practice, you'll learn how
to mix accurate secondary and tertiary colors from these three primaries.
Another must for oil paint supplies is a good quality set of
brushes specially designed for oil painting. As with tubes of oil paints,
you'll only need a few basic ones to start and can add more at a later time. Be
sure to keep your oil paint brushes separate from any other brushes you use to
paint with acrylics or other types of paint. Any of these oil paint supplies
are available from local or online art supply sellers such as
ourartsupplies.com.

OurArtSupplies.com

OurArtSupplies.com
Tuesday, November 29, 2016
Getting Started With Charcoal Artwork
As one grows as an artist, the
connection between their artwork and charcoal painting materials they choose
becomes noticeable. Charcoal artwork is a lot of fun because it gives you the
freedom to make big, sweeping movements across the sketching sheet while
getting messy. If you're interested in learning how to draw with charcoal, you
want to invest in some quality charcoal painting materials to accelerate your
artistic development.
Hard or Soft Charcoal?
Just like ordinary pencils,
charcoal comes in different varieties of hardness. The hardness rating is
denoted using a number and a letter (H for hard, B for soft). 6B is often the
softest, while HB is the hardest.
The harder the charcoal one uses,
the lighter the line it produces on the drawing sheet. It's worth noting that
softer charcoals produce dark lines that smudge easily, while their harder
counterparts make cleaner, sharper edges.
Vine Charcoal
You can also opt for uncompressed
charcoal, which comes in the form of vines. Like the name suggests, vine
charcoal comes in the form of a burnt vine/willow branch. Unlike compressed
charcoal, you'll find it in the form of long sticks that are harder and more
delicate than the former. It also comes in varying thicknesses, from thin to
jumbo size. Vines are ideal for creating very fine, light lines and shading
throughout a sketch.

Drawing Paper
For most new artists, newsprint
works as an economical drawing material where they can practice as much as they
want to perfect their technique. While newsprint allows charcoal to produce a
variety of marks, it tends to smudge easily due to the smooth paper. You could
therefore opt for charcoal paper which as a fine-ribbed texture that highlights
the charcoal's color. While you might make the occasional smudge, it creates a
harder line drawing than a smoother sheet would. Experimenting by mixing and
matching different charcoal and paper varieties will help you find the right
combination for your style.
Work Area
When familiarizing yourself with
a new drawing medium like charcoal, you want to work on a vertical surface.
This reduces the likelihood of dragging your arm through the drawing. Besides,
charcoal drawings are quite dark, which means highlights and details can be
hard to see in shadow. Your best option would be to place an easel in a well-lit
area so that you can make out all the details while getting the practice you
need.
Eraser
Your best choice of eraser when
working with charcoal is the kneaded eraser. Being quite soft, it can be molded
easily by kneading it like clay. You can use it to remove a section of the
drawing to create a highlight or as a blending tool when smudging charcoal into
the finer parts of a drawing.
Charcoal artwork is an easy technique to pick
up, mainly due to the medium's forgiving nature. And you can try other charcoal
painting materials as you please -- exploration is an integral part of the
creative process. So start drawing with charcoal today and see what world you
can open-up.
Monday, November 28, 2016
All You Need To Know To Get Started With Colored Pencils Art Work

To get started in any kind of art, be it painting, drawing,
crafts, or any other type, it is important that you have two main components.
These two components are technical know-how (this is how you develop artistic
skill) and the right tools. It is these two components that will determine how
well you do as an artist, even if art is a mere hobbyist pursuit for you. We
look at each component individually below and how they affect pencil color art.
1. Technical Know-How
Despite what the popular saying may suggest, ignorance is
never bliss. The knowledge you lack can put you at a significant disadvantage
while growing in knowledge can arm you with all you need to succeed. This is
true in life and true in art. As such, it is important that (if you haven't already)
you join a class somewhere or even start using self-teaching resources that are
often available for free. Whatever you opt for, start learning. The more you
know, the more you'll be able to do.
2. Getting appropriate tools
Tools are what you use to get the job done. High-quality tools can allow you to do a
better job, while low-quality ones can, at best, make the job at hand that much
more difficult. As far as it relates to pencil color art, getting the right colouring
pencil sets is imperative. Doing so can significantly improve the quality of
your pencil color art.
Here is what to look for in colouring pencil sets
Sometimes, when you are a beginner, it is hard to know which
colouring pencil sets may be best for you. However, with the following tips,
sifting through the noise just got a whole lot easier. The three main
characteristics to use to differentiate the quality between sets are:
A. Types
There is more than one type of colouring pencil sets
available on the market. They include wax, oil, and water-soluble. Your
artistic needs will determine which is more appropriate for you. Wax colouring
pencil sets are great for providing coverage when you color. However, they
break easily and are likely to wear quickly. Oil colouring pencil sets on the
other hand use a vegetable oil based binder and are generally harder than wax
options. Water-Soluble colouring pencil sets are either wax or oil-based, can
be hard or soft depending on the make, and the pigment can be liquefied in
water.
B. Surfaces
Knowing how surfaces or material you will be creating your
art on, and how these surfaces respond to different types of colouring pencil
sets, is very important to knowing what will work for you. Generally, porous
surfaces can handle any type of coloring pencil crayon set. A toothy surface is
needed to anchor the colored pencil's pigment if a heavy application of the
same will be used. Rough or textured watercolor paper or cold pressed paper is
a good fit for water-soluble colouring pencil sets.
Once you decide on your surface, you can opt to use the
appropriately suited colouring pencil set.
Friday, October 28, 2016
Table Top Easel for Painting
Table Top Easel for Painting
If you are a beginner to painting, you are asking yourself.
“Do I need a table top easel for painting?”

Some seasoned painters prefer to work without an easel. But if you are new to painting it is an easy
adjustment and has its advantages.
- · When painting at a table the easel will save room on your work surface for all your other tools, such as paints, brushes, pallet knives etc.
- · The comfort of sitting instead of standing is a bonus, especially for those of us with leg problems.
- · It also brings the top of your canvas closer to you and makes it easier to reach.
- · With that said it’s easier on your back so you don’t have to work hunched over.
- ·
Having your canvas on a table top easel for
painting also gives you the ability to step back and look at your painting from a distance.

- · It is a great place to let your canvas dry without collecting much dust as it would by laying horizontal on the table.
- · It cuts down on the glare you will get from wet paint while working.

Table top easels come in different styles. A frame, H frame, tripod and some with
storage drawers.

You will want to determine your needs and choose the one
that best suits them.
To Gesso or Not to Gesso
I find when
I order canvas online and settle for the cheap canvas, the factory sprays the
gesso on the canvas. After that
application they spray a sealant which causes the paint not to adhere very
well. Why do they apply a sealant? The
sealant is used by the factory for shipping purposes to keep the canvases from
sticking together.
How do I resolve this?
Well I gesso. Why? Because I want to give my canvas its
tooth back. I want it to grab the paint and hold on to it.
Then why do I buy a pre-primed canvas? Well if you ever primed a
raw canvas you would know why. It is a lot easier and faster to apply one
thin coat of gesso to a pre-primed canvas then it is to pre-prime a raw canvas.
If you order canvas online,
you can find the more expensive canvases at lower costs and you will not need
to add gesso.
But let’s not forget you
can apply gesso to just about any surface to prepare it for acrylic paints.
Another reason to gesso
a pre-primed canvas is you can alter your surface at this stage. Example:
Make it smoother by adding gesso and sanding with a fine grit sandpaper.
Or you can add textures to your gesso when applying to the canvas.
Gesso is an inexpensive
way to save on the amount of paint you use.
How to tighten your canvas
Among my paint art supplies you will find canvases. I find when buying a pre-stretched canvas from a discount art store they are sometimes loose or flimsy. Let’s just face it, the canvas is not tight.
The very first thing I would like to remind all of our beginners is to remember to remove the plastic wrap from the canvas before you begin to do anything with your canvas. (Yes this does happen a lot)
Here is how to tighten your canvas. Get yourself a spray bottle with water in it. Now, turn your canvas over. You should be looking at the back side of your canvas and you should be able to see the wooden frame. Now, spray the back of your canvas with the water from your water bottle. Next use your hand to rub the water around to help even the water. Next use a paper towel to absorb the excess water from the back of the canvas.
At this point you can find a sunny spot and set your canvas there to dry. Please remember if you lean your canvas, make sure nothing is poking or push in on the un-supported part of the canvas. I use the wooden frame edges to support my canvas against something.
Am I always patient? No! Sometimes I just want to paint now. So I grab my hair dryer. I use a Medium heat setting. I never use Hot. I then dry the back of my canvas. Why don't I use hot? Well, it’s because I don’t want to form a bad habit. For example, If I want to tighten a canvas that I have previously painted, I don’t want to take a chance of ruining the painting by using a hot temperature.
This technique also works on spots in your canvas that have been spot-stretched or dented. (When the canvas was leaned against an object and it stretches a dent in the canvas)
- OurArtSupplies.com
Thursday, October 13, 2016
Why do I need Good Paint Brushes?

Let me start by telling you that good paint brushes do not have to be expensive. Just about any paint brush can be a good paint brush for you, if you take care of it and clean it properly after every use. So yes anyone can afford good paint brushes. It is all about the care which I will follow up with more information on that at a later date.
So most of you are saying.
What brush do I start with?
Well there are; Flat Brushes, Round Brushes, Angle Brushes, Filbert Brushes, Bright Brushes, Detail Brushes, Fan Brushes and on and on.
Now that you are completely confused, I started with one brush. A 5/8-inch flat. Why? I wanted to see what it could and couldn’t do. I found out there were a lot of different uses for this brush and used it for background applications all the way to applying blades of grass. I chose a stiffer brush to help with the spring back for making fine lines. The stiffer brush also helped to push the paint on to the canvas easier. I was able to make trees and flowers. Now please understand I was painting on a 16 X 20 canvas so a 5/8-inch brush can do a lot on a canvas that size.
One thing I found I could not do, were small circles! Hmmm? Guess it’s time to get me a round brush. I chose a detail round brush with stiff bristles. Why stiff? Because I was used to painting with a stiff brush. This brush opened up a whole new world of ideas for me. “ With tiny little details.”
My third brush ended up being a 1/8 inch flat again stiff. I was stuck on stiff bristles. This gave me the ability to make things smaller than its 5/8-inch counterpart.
I painted a long time with just those 3 brushes and created a lot of fun and interesting paintings that most people are amazed when I tell them I used just 1 or 2 brushes.
I guess the moral to this story is, it does not matter what brush you learn to paint with. Just paint with it and find out what it can help you create. Get to know your equipment and have fun!
So you can see, that’s what good paint brushes can do.
Thursday, August 25, 2016
Saving Money On Professional Art Supplies

Any artiste is well aware of how expensive shopping for professional art supplies can be. A tube of paint or a single brush could run well into the 3 figures. It can thus be daunting to toe the line between turning a profit by watching one's budget and using cheap, inferior materials. Fortunately, it's possible to save money on great supplies without skimping on quality or having to go without the essentials. All it takes is a little time, research effort and prudent shopping.
Avoid Overdoing on Paint - To keep costs down and avoid unnecessary waste, one can start by using just enough amount of paint. When portioning out the colors, it would help to be keen on how much paint is necessary and its intended use. Mixing colors on the go and recycling paint used for previous works also reduces waste.
Another great technique is to purchase tubes of glazes as opposed to impasto. Because glazes are thinner, they have the ability to stretch easily. Student acrylic paint is another great option ideal for those who want a certain effect without spending too much.
Stretching Canvas - Primed and pre-stretched canvases are usually expensive, something that often presents a headache for artistes working on thin commissions. But because canvas tends to be more suitable, you could try stretching your own canvas as a way to save money and give yourself some room for experimentation.
In doing so, you'll not only have more surfaces to work with, you'll also not be forced to use expensive canvas for the 'good' projects. Reusing old canvases could also help save money. Many artistes often discard old pieces they don't like or those that stand low chances of selling. But a canvas can easily be recycled by priming it or flipping it over.
Maintain Existing Supplies - If art supplies are properly maintained, they can last for years. A quality paintbrush set or pallet knives could practically last a lifetime. But unfortunately, a good number of artistes don't maintain their stuff properly, something that tends to be expensive in the long-run.
Always ensure your brushes are dry before storing them. This can easily be done by shaking water out and patting the brushes dry with a towel in the direction of the bristles. Brushes should also be kept separate; those used with oil-based paints shouldn't be mixed with their water-based counterparts. After using your utensils, spare some time to clean them with soapy water or turpentine.
It would also help to keep the studio clean and neat since it's where most of the stuff is stored. A properly organized space means that each item will be accessible, clean and easy to put away when no longer in use. To avoid messes, try laying down old newspaper sheets or plastic tablecloths and have a garbage disposal can in close proximity.
To be profitable, one must have the ability to distinguish between needs and wants. By keeping your supplies simple and valuable, you'll be able to create quality artwork without breaking the bank. A good tip is to purchase essentials of the best quality in small amounts.
Subscribe to:
Posts (Atom)