
Tuesday, February 13, 2018
Wednesday, January 24, 2018
Letting My Creativity Flow With A Heavyweight Drawing Pad
Letting My Creativity Flow With A Heavyweight Drawing Pad
 I have always had a love of drawing and it is nice to have some great ways to explore and to let my creativity out. There are some great supplies for drawing out there and I can always find something that works well for any kind of creative endeavor that I want to take on. Finding the right supplies helps me out a lot when it comes to my drawing.
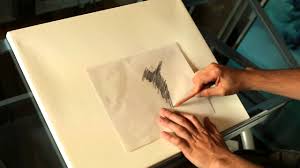
It is nice to have some awesome drawing pads that I can use for my best designs. I love finding some new pads that I can use and I love finding some pads to use of the heavyweight kind. These pads are great for practicing some blending techniques and for doing some sketches and for experimenting with all kinds of drawing.
The heavyweight drawing pad that I have been using has worked well for my drawing hobby. I love to do some drawing after work and on the weekends as well. I can always find some inspiration from all of the sports and hobbies that I love to do, and from the beauty of nature that is all around me. My drawing pad is my buddy for doing some great drawing.
Tuesday, April 4, 2017
Using Gesso To Make Your Canvas Smooth For Painting

The importance of using a smooth canvas for painting cannot be
overemphasized. Gesso is the most commonly used primer for acrylic painting.
Every painter knows how enjoyable it is to paint on primed canvas compared to
using unprimed canvas. Gesso makes the surface more absorbent and gives the
painting a fine finish, which is what every painter is after, unless you are
looking to have a special kind of effect. Gesso can either be bought or
prepared at home. Both options have their upsides and downsides. Buying gesso
will cost you more but will save you valuable time which you can use to paint.
Preparing gesso at home takes time but the good thing about it is that you can
adjust it to suit your preferences.
Preparing your smooth canvas for painting: Steps to Follow
You will need gesso, a paintbrush, sandpaper and some water. Start
by diluting the gesso with water; the amount of water you add depends on the
effect you are looking to achieve. Use the paintbrush to apply the diluted
gesso to the canvas in parallel strokes. You should then let the canvas sit for
a couple of hours for the gesso to dry. The longer you let it sit, the better;
so, if you can leave it to dry overnight, that would be the best option. Before
applying the second layer of gesso, you need to check whether the first layer
is dry. If the canvas feels cold to touch, the gesso is not completely dry. You
need to give it a few more hours before doing anything to it.
Use sandpaper to sand the canvas after the first layer is dry and
then apply the second layer of gesso in perpendicular strokes to the first
layer. Again, you need to let it sit for a couple of hours before you do
anything to it. You can apply as many layers of gesso as you want depending on
the effect you want to achieve, but just remember to let the gesso dry and sand
the canvas after every layer. The more the layers of gesso, the more absorbent
the painting surface will be. The final coat should be applied using undiluted
gesso. Only start painting after the gesso dry.
Bottom Line
Using gesso to prime your canvas is not a difficult task. Just
follow the steps above and you will end up with a smooth canvas for painting.
Gesso is also versatile as you can add some paint to it to tint it and end up
with a wonderful effect on your smooth canvas for painting. Although you have
the option of buying pre-primed canvas, preparing the canvas on your own is fun
and you can play around with the gesso to create some special effects that you
would not be able to achieve with a pre-primed canvas.
Thursday, March 16, 2017
What Type Of Brush Should I Use For Oil Painting
When oil
painting, brushes will make or break your finished masterpiece. A good brush
will help you bring your creation to life while a bad brush will just serve to
frustrate and impede your painting every step of the way. Even the best
painters will have trouble painting something they can be proud of with a bad
brush. The best brushes for oil painting are a valuable investment and worth
every penny. When deciding on the best brushes for you, you will need to
consider the purpose of the brush, the feel of the brush in your hand and the
end result you want to achieve.
Best Brushes
for Oil Painting:

Purpose
Essentially,
oil painting brushes are made from two different hair types. The bristle brush
uses bristle hair from pigs while sable hair brushes use sable hair from the
sable, which is similar to a weasel. Bristle brushes work exceptionally well
when first starting out your painting as they cover large areas with ease. The
ideal bristle brush is a half-inch or wider. Sable brushes are perfect for
incorporating details and working in small areas, and should be smaller than a
half-inch. If you buy a sable brush, make sure it is a sable brush specifically
for oil painting as watercolor sable brushes lack the spring needed when
painting with oil.
Shape
There are
several different shapes and styles of brush heads for oil painting including
rigger, mop, angle, fan, filbert, bright, flat and round. If you use the wrong
style head for a certain aspect of your painting, you are not using a bad
brush, just the wrong one. It is important to know which type of style will
work best for the aesthetic you are wishing to achieve. If you are just
starting out, and want to jump right into painting without experimenting with each
set of style just to find the best brush for you, go with the flat and filbert
brush. You can achieve nearly every look you want for your painting with those
two brushes. The flat brush will create the sharp edges while the filbert
provides softer, rounder strokes.
Feel
Just as each
artist is different, so are their hands. Where one type of brush handle feels
good and natural in one person's hand, that may not hold true for another.
Visit an art supply store and notice how each brush feels in your hand, run
your fingers along the tip of each bristle and watch to see if the hairs are
stiff and bounce right back in place as they should. Natural bristle and sable
brushes are always better for oil painting than synthetic fibers.
Determining the best brushes for oil painting is
about as individualized as each painting they create. Don't be afraid to
experiment with different brushes and different brands to find the best brush
for you.
Monday, February 27, 2017
What Type Of Brush Should I Use For Acrylic Painting?
For centuries, oil paints dominated the market for art materials. However, by the mid twentieth century, a new material started to find favor with artists. Now, acrylic paints are just as popular as watercolor and oil are, with artists the world over. If you enjoy creating art, one thing that you will want to know is what are the best paint brushes for acrylic painting.

If you have no experience of working with acrylics, it is often quite daunting to try to identify the best paint brushes for acrylic painting at an art store. Usually, these stores have a plethora of paint brushes laid out in front of you. Synthetic materials, like nylon, are the best paint brushes for acrylic painting. Supple and soft brushes are suitable for applying thinned paint, and stiff brushes work well for thick paint applications. Acrylics are tougher on animal hair brushes, which can expand and become less springy when placed in water.
The majority of brush makers offer synthetic brushes specially designed for painting with acrylics. These brushes are springier and more durable than those designed for watercolor. They can withstand more use and maintain their shape nicely, making them an excellent option for novices.
While you are in an art supply shop, pick up the brushes and bend their tips using your thumb. They ought to feel firm, similar to hogs hair brushes (some synthetics do feel like this). If a brush lacks sufficient resistance, thicker acrylics will be hard to maneuver on your canvas surface.
Paint brushes have varying bristle shapes that affect the marks they make. Flat bristles are rectangular and long. They have flat 'toes' and can produce flat strokes. Also, they can be used to produce controlled lines and defined edges.
Filbert brushes have curved 'toes'. These brushes can hold a decent quantity of paint and produce a broad range of marks. For this reason, they are commonly used by acrylic and oil painters alike. Round brushes are the most useful types of brushes. They have round 'toes' and can create controlled, intricate marks along with thicker ones.
Brushes can be rather costly. To reduce the expense, you could consider purchasing a set of paint brushes. These sets come in a variety of shapes and sizes. Some sets are not particularly high quality, however they are still a helpful option for novice painters. They enable you to become accustomed with the different sizes and kinds of brushes, without making a huge investment.
After you have determined the best paint brushes for acrylic painting, you can grow your collection of brushes and purchase higher priced, better quality brushes of your choosing. There's no rush, so take the time to learn and let your creative juices flow.
OurArtSupplies.com
Tuesday, February 21, 2017
How To Choose The Best Watercolor Brushes
When planning for a painting project one of the things you need to
do is choose the best brush. However, the process of choosing can be
challenging because of the variety of options available in the market today.
With the right information, you can be able to narrow down your search for the
best watercolor brushes and achieve exceptional results after your project.

Consider the bristles
There are different types of brushes with some featuring natural
hairs while others are made of synthetic bristles. Professional painters prefer
those made of natural hairs because of the advantages associated with them. A
particular advantage is that natural hairs have ridges that work effectively in
holding more watercolor. Individuals that choose synthetic brushes must compensate
by picking brushes that are larger. A job that is done by a natural hair brush
number 8 requires that the painter uses a synthetic brush number 10.
Shape is key
Brushes are available in a lot of shapes. However, few are
designed to provide exceptional results when using watercolors. Individuals
with extensive experience can attest to the efficiency of using round or flat
brushes when using watercolors. A coated brass ferrule or seamless nickel
ferrule ensures that no bristles are lost during use. The material used to make
the ferrule also ensures that the brush does not get damaged due to rust. A
ferrule is the part of the brush that joins the bristles and the handle.
The size matters
The size of the brush you choose for your watercolor painting
project plays a huge role on the final outcome. If you want something that will
create finer details it may be prudent to use a small brush. A large painting
that does not necessarily pay attention to finer details can be done using a
larger brush to ensure you cover large areas within a short time. Natural
brushes hold more watercolor than synthetic colors meaning the choice of
materials can also play a role in determining appropriate size. It is equally
important for you to choose a size that you feel comfortable with.
The brand
Before settling on any of the best watercolor brushes it may be
wise to consider the brand. Keep in mind that a lot of brushes in the market do
not conform to the highest standards of quality and may start getting worn out
a few days after initial use. Choose brushes that are manufactured by
trustworthy brands to guarantee you enjoy the benefits of good quality
products.
The cost of the best watercolor brushes
Take some time to find out the cost of the various brushes in the
market. The best watercolor brushes are not necessarily expensive. Choose
products that are sold at reasonable costs.
Monday, January 30, 2017
How To Transfer Your Drawing Onto A Canvas Using Charcoal For
Drawing

Before plunging into the steps of how to transfer your
drawing onto a canvas using charcoal for drawing, it is important to understand why this needs
to be done. The main thing is you have just completed a work of art which in
terms of size is but a replica of the final artwork that you have in mind.
Without utilizing charcoal for drawing, you will have to recreate your
masterpiece part by part and line by line.
No exquisite artist wants to do that. That's like repeating
the creative process unnecessarily.
Besides, there is a huge chance that you might not be able to replicate
the images in the drawing as faithfully as the original composition. Charcoal
drawing to the rescue.
Charcoal drawing takes time, but it's the artist's first
choice when enlarging his or her composition. Even Michelangelo did not start
by painting his masterpieces on the incredibly large ceiling of the Sistine
Chapel. There had to be a small version of the images before they could be
exploited to gigantic proportions. However, it's not clear if the genius
utilized charcoal for drawing at all in order to complete his monumental task.
Nevertheless, modern painters are beholden to charcoal for
drawing especially when it's time to transfer their works to a piece of canvas.
Chances are, you have seen street painters compose their drawings from scratch.
Still, in most cases, these unsung artists use either a model or a view.
That model could be you. But let's say that you want that
painting of you to be transformed into a fresco for display in your home or
room? Charcoal for drawing is the modern solution.
Depending on the size of the painting that needs to be blown
up, it could take a few hours to finish a charcoal for drawing task. Skipping
the all-important task can result in a haphazard piece of work that lacks the
proportion as well as the perspective of the original material.
The quintessential artist's trick to transfer his or her
creative vision to a large piece of canvas involves heading to the commercial
copying machine, which can enlarge any image to the desired size. Of course,
artists of centuries past did not have this luxury, so modern painters beat
them when it comes to maintaining the aspect ratio of their creative works.
Life is unfair, but charcoal for drawing is here to
stay. This approach involves turning
over the enlarged paper copy of the original artwork and practically charcoal
painting the surface of the images. But
before doing this, the artist has to underline sections that do not have any
images. This way, the charcoal for drawing is applied only on portions of the
painting with objects.
Thus, charcoal for drawing is a preparatory period for
accomplishing the task of rendering the original concept into its final and
much bigger format. With ratios and proportions intact and accurate to
specifications, the artist proceeds with completing the creative task with oil
paints.
Subscribe to:
Posts (Atom)